
Overview
Connecting Meta Ads lets WorkLLM read your ad performance and, with the permissions listed below, help you manage your campaigns. Meta connects apps like WorkLLM through a system user, which keeps your personal login out of the picture. You create the system user in your Meta Business Manager, generate a token for it, and add that token to WorkLLM. The setup takes a few minutes when you have the right access. Steps 3 and 4 are worth a second look, and the last section lists a few quick things to check if something does not show up as expected. Connecting Meta Ads uses 10 credits from your workspace, one time. This article covers the following topics.- What you need before you start.
- How to create a system user and assign your ad accounts and app to it.
- How to generate the token, which permissions to select, and why Never is the recommended expiry.
- How to copy the token and add it to WorkLLM.
- A quick checklist, and a few quick fixes.
The short version
- Open Business Settings in Meta Business Manager.
- Go to Users, then System Users, and create a new system user.
- Assign your ad accounts and your app to that user.
- Select Generate New Token, choose the permissions, set expiry to Never, and add the token to WorkLLM.
Before you start
Step 1: Open Business Settings
Go to Meta Business Suite or Business Manager and select Business Settings. You can also open it directly at https://business.facebook.com/latest/settings.Step 2: Create a system user
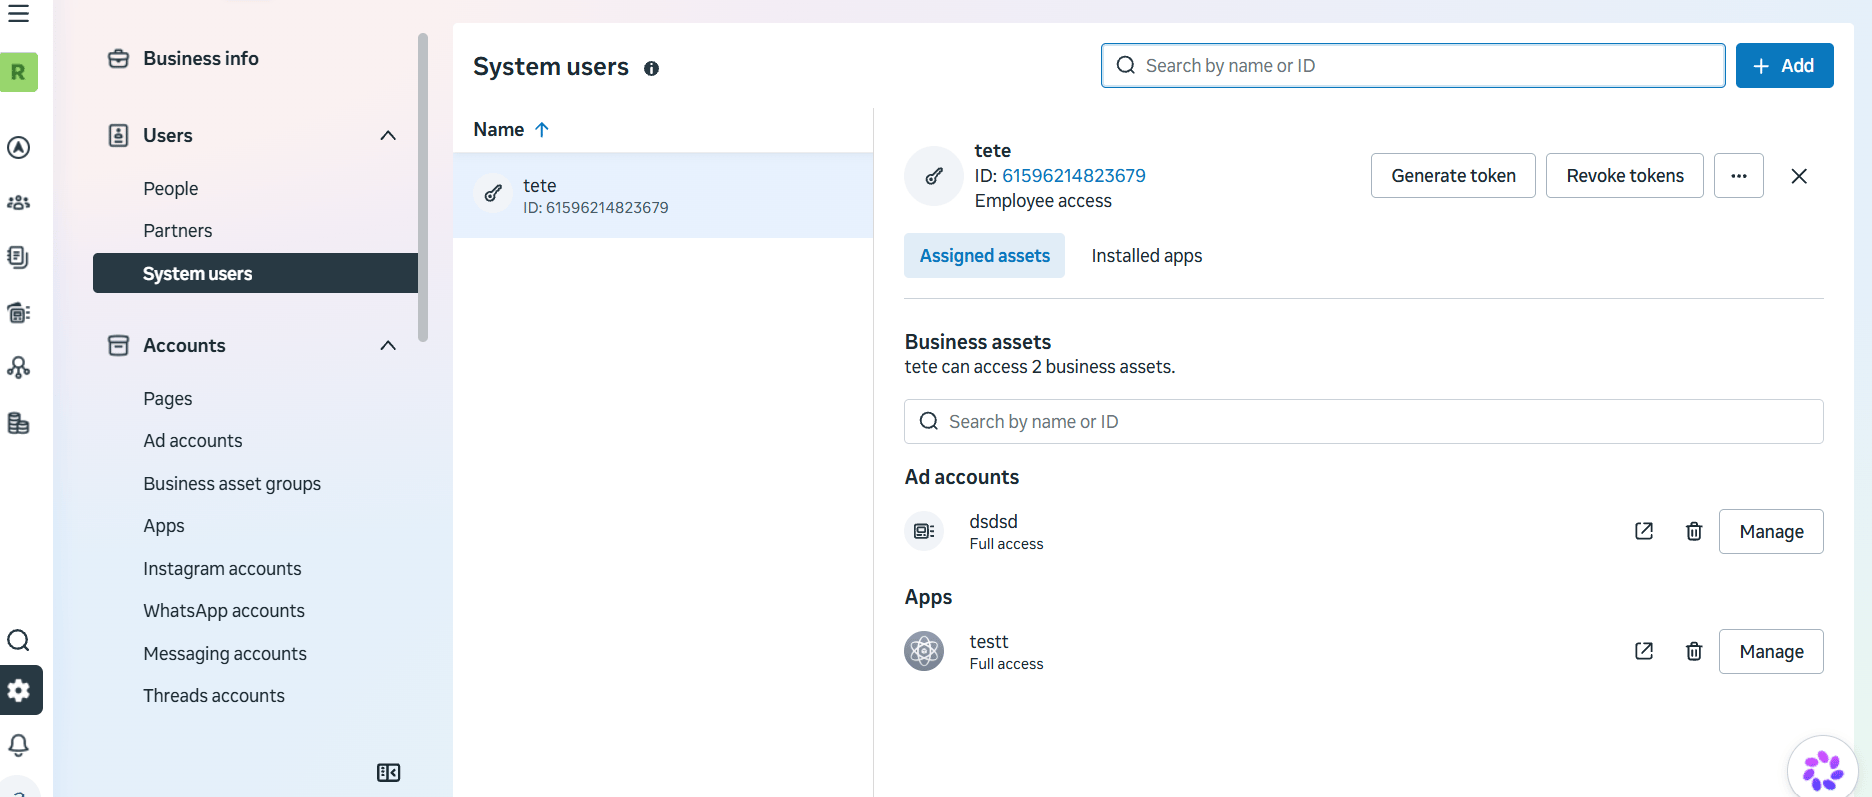
- In Business Settings, select Users, then System Users.
- Select Add.
- Give the user a name you will recognize later, for example “WorkLLM Integration”, and set the role to Admin.
- Select Create System User.
Step 3: Assign your ad accounts to the system user
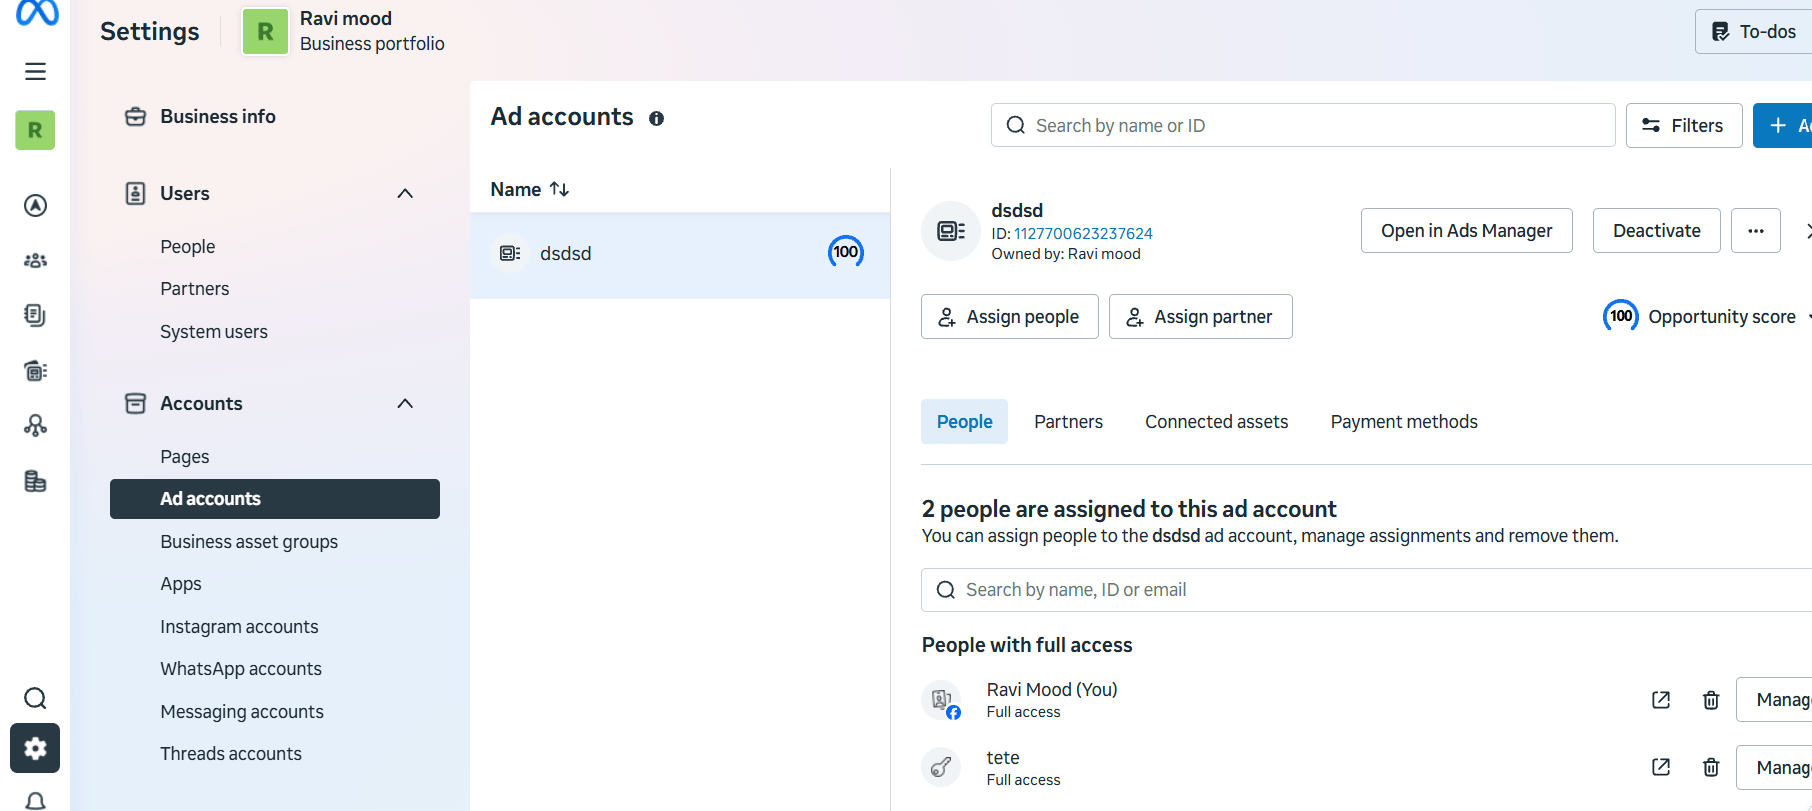
A system user works with the ad accounts assigned to it, so this step decides which accounts WorkLLM can use.- Go to Accounts, then Ad Accounts, and select the ad account you want to use with WorkLLM.
- Add the system user you created in Step 2 to that ad account. The arrow in the screenshot below shows where.
- Turn on Manage ad account, which gives full control, and select Save Changes.
- Repeat this for every other ad account you would like to connect.
Step 4: Assign your app to the system user
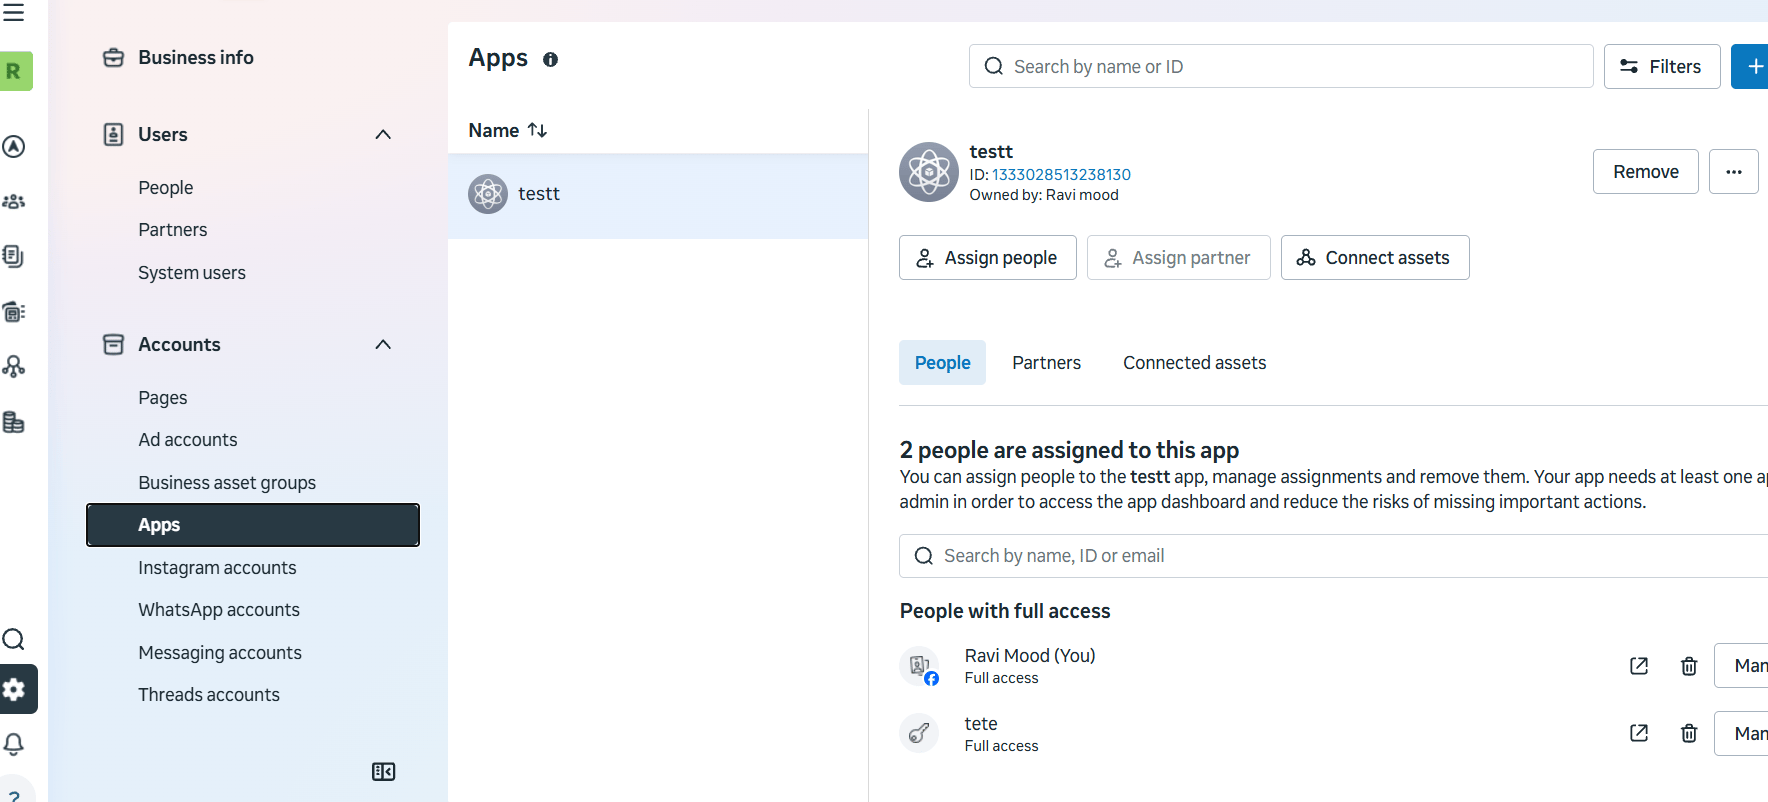
The token is generated for an app, so the app is assigned to the system user as well.- Go to Accounts, then Apps, and select your app.
- Add the system user to the app. The arrow in the screenshot below shows where.
- Turn on Manage app and select Save Changes.
Step 5: Check that the app has Marketing API
Open your app in the Meta developer dashboard (developers.facebook.com) and confirm that Marketing API appears as a product. If it is not there yet, add it now. This makes the permissions in the next step available.Step 6: Generate the token
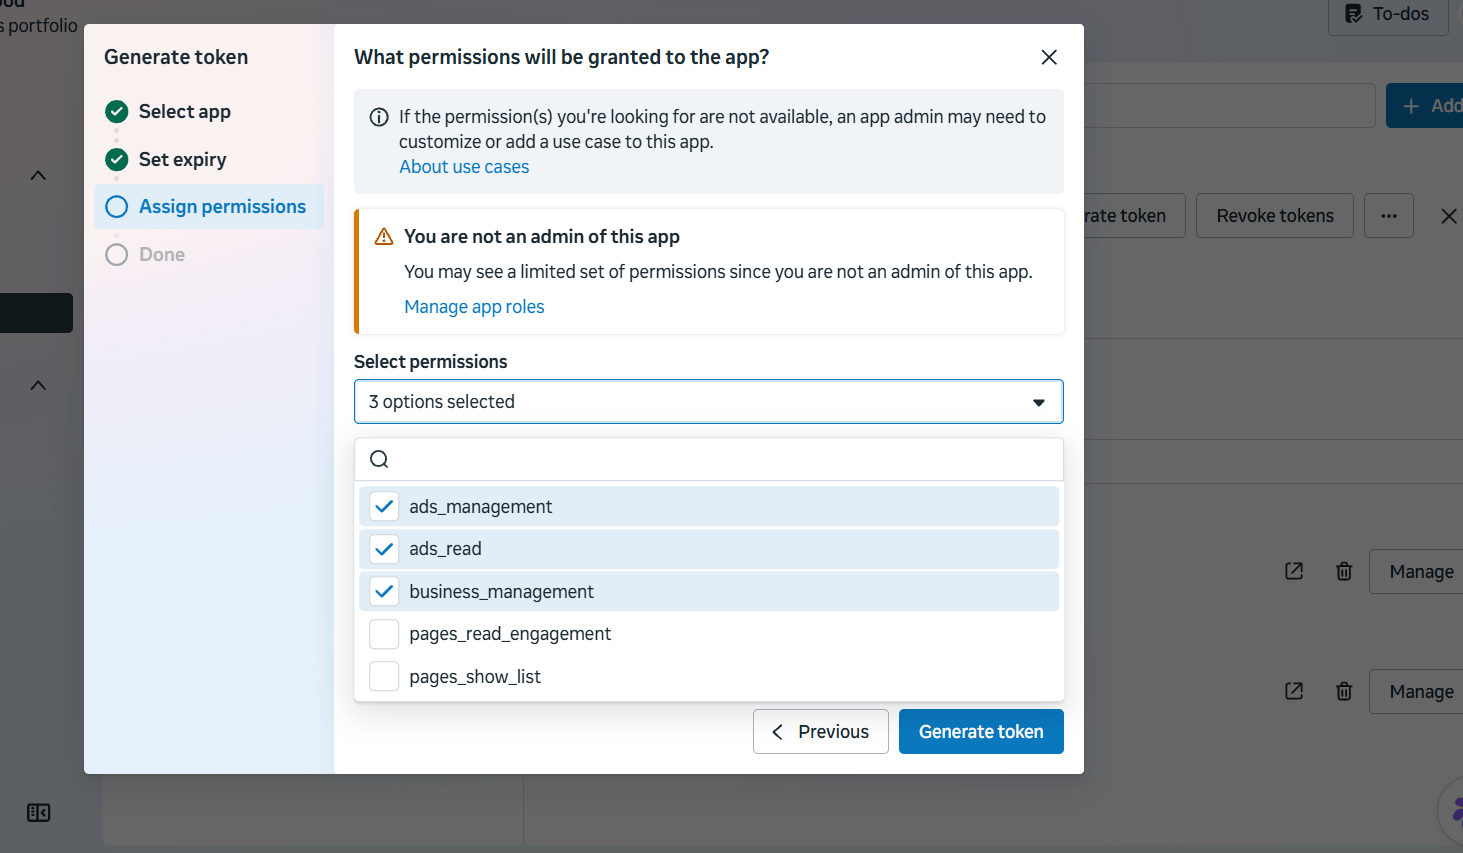
- Go back to Business Settings, open the system user, and select Generate New Token.
- Choose your app.
- Set the token expiration to Never.
- Select these three permissions:
- ads_read
- ads_management
- business_management
- Select Generate Token.
Step 7: Copy the token and add it to WorkLLM
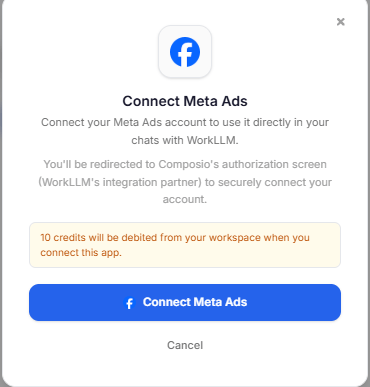
Copy the token before you close the dialog, because Meta shows it only once. If you miss it, you can generate a new one at any time.- In WorkLLM, go to Home, then Integrations, then Meta.
- A Connect Meta Ads dialog opens, followed by a pop-up window for authorisation.
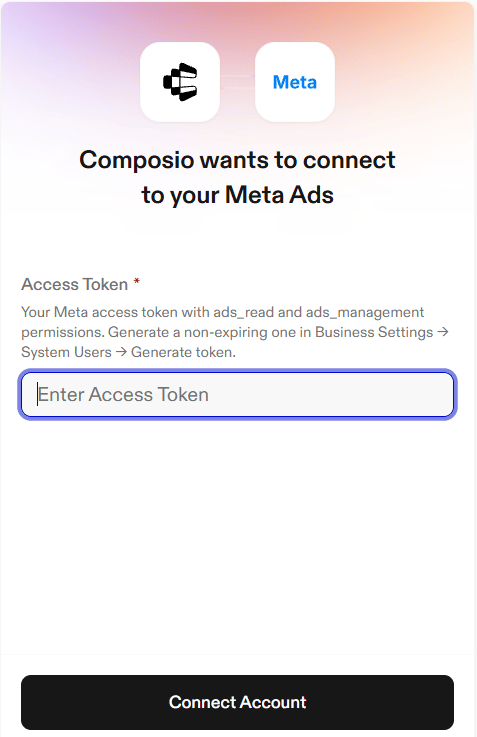
- Paste your token into the Access Token field and select Connect Account.
Quick checklist
Before you connect, it helps to confirm each of these.- Your ad accounts are assigned to the system user with Manage ad account turned on.
- Your app is assigned to the system user with Manage app turned on.
- The app has the Marketing API product.
- The permissions ads_read, ads_management and business_management are selected.
- Token expiry is set to Never.
- You copied and saved the token before closing the dialog.